Hatsuyukikazura Design Notes
This page covers how the pattern is worked, along with other notes about the design.
Construction
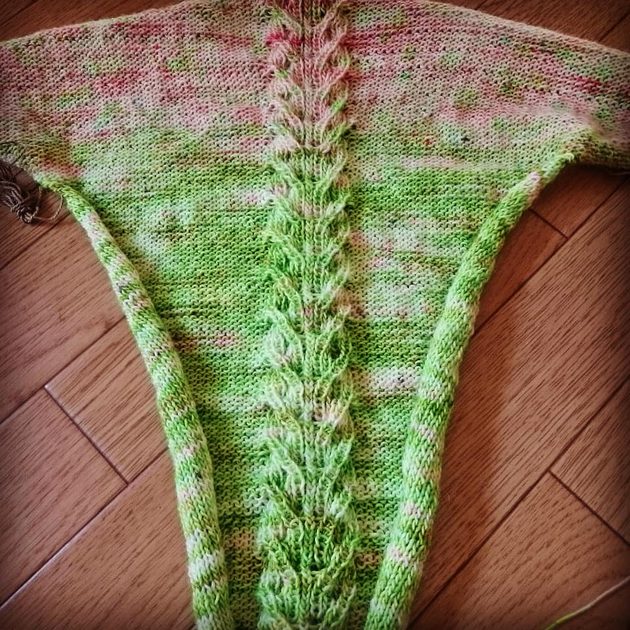
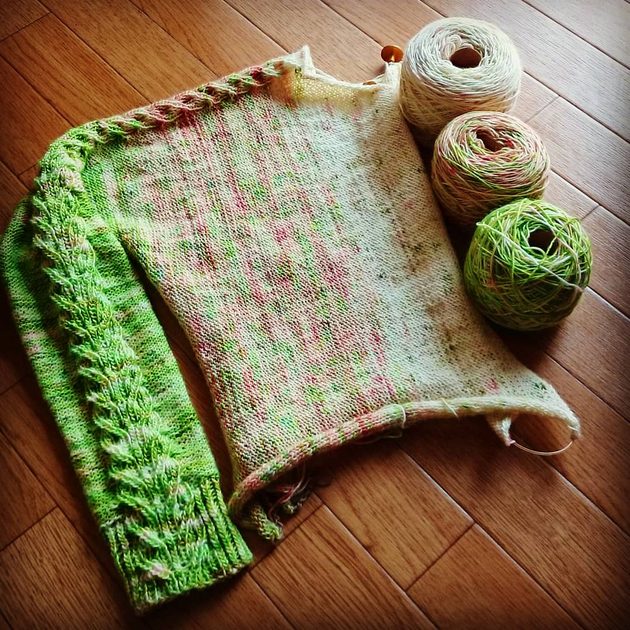
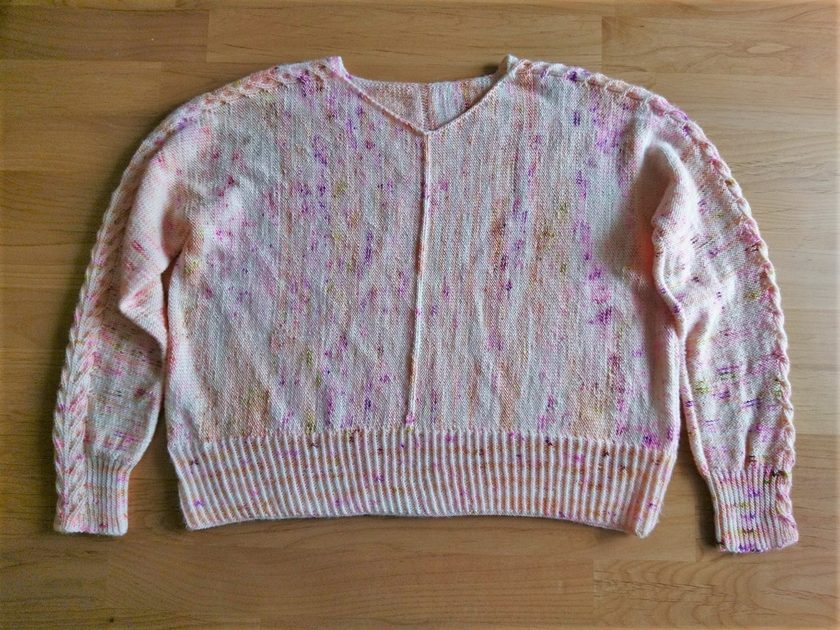
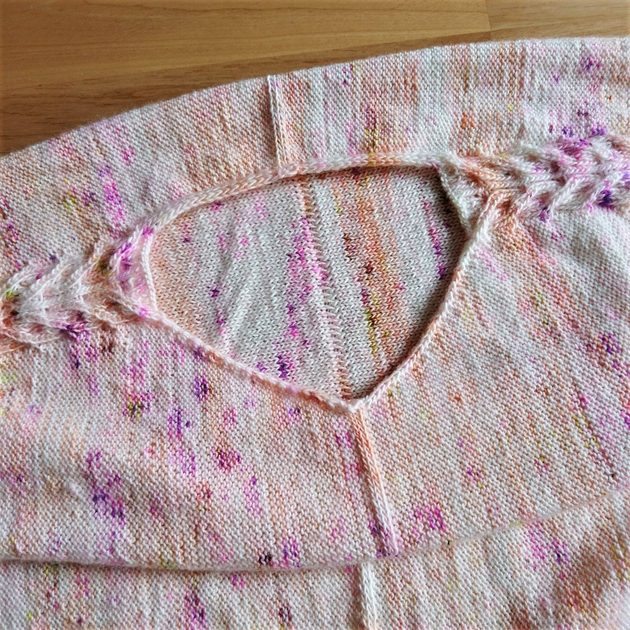
Hatsuyukikazura is a sideways-knit pullover that follows a unique process: unlike typical top-down or bottom-up sweaters, it starts at the cuffs and is worked flat toward the center of the body before the left and right halves are joined together at the center. While the overall body features a simple reverse stockinette stitch, the dimensional cable pattern flowing from the sleeves to the shoulders and the distinct center line beautifully pull the design together.
Cuff
Begin at the cuff. Cast on using the long-tail method and work back and forth in twisted ribbing. The base for the striking cable pattern positioned down the center starts right here in this cuff section. Although this pattern may appear intricate at first, it is simply a regular arrangement of a single 7-stitch cable crossing to the left and right, making it easy to work through once you get the hang of it.
Sleeve
From here, switch the fabric to reverse stockinette stitch. After working an evenly spaced increase row on the first row, continue knitting the sleeve from the cuff toward the body while maintaining the center cable pattern. By regularly increasing on both sides of the pattern, a beautiful silhouette naturally widens from the cuff toward the body.
Body
Once the sleeve is fully worked to the required length, add large provisional cast-ons for the front and back bodies at both ends of the sleeve using a crochet chain method. From this point, work all the added front and back body stitches along with the center sleeve section together, continuing the flat construction while maintaining the center cable pattern and increases. This entire process is worked in the exact same manner for both the left and right halves of the pullover.
Right Body / Left Body
When the body is worked up to the neckline, bind off the cable pattern that has been flowing from the shoulder to finish it, then separate the front and back bodies to work each section independently flat in reverse stockinette stitch. On the front body, decrease regularly along the edge to shape the V-neckline. This shallow V-neckline is designed to connect beautifully and seamlessly with the pattern that ran along the shoulder. On the back body, work straight while incorporating slipped stitches along the neckline edge. By slipping the stitches at the edge, a dimensional line forms that connects beautifully from the shoulder pattern, preventing the neckline from sagging and keeping it neatly structured when worn. This separation process is worked symmetrically to complete both the right and left body pieces.
Join
Place the completed left and right front bodies, as well as the back bodies, facing each other to join them at the center of the body. Instead of a typical slip-stitch join or seaming method, use an I-cord Join, which creates a prominent, cord-like dimensional line. This line running straight down the center adds a sophisticated accent to the design. Once the front and back centers are joined, use a tapestry needle to sew the underarms together with mattress stitch, and join the sides of the body securely using a three-needle bind-off join from the wrong side.
Hem
After all the pieces are assembled into a three-dimensional garment, move into the final hem section to finish the overall silhouette. Join the yarn at the side seam line, pick up stitches evenly all the way around the bottom edge of the body, and begin working in the round. Knit a clean, beautiful twisted ribbing to the desired length so that it flows naturally from the reverse stockinette body. Finally, bind off purlwise with a slightly firm tension to prevent the hem from stretching or flaring out.
Variations
Multicolor Gradient
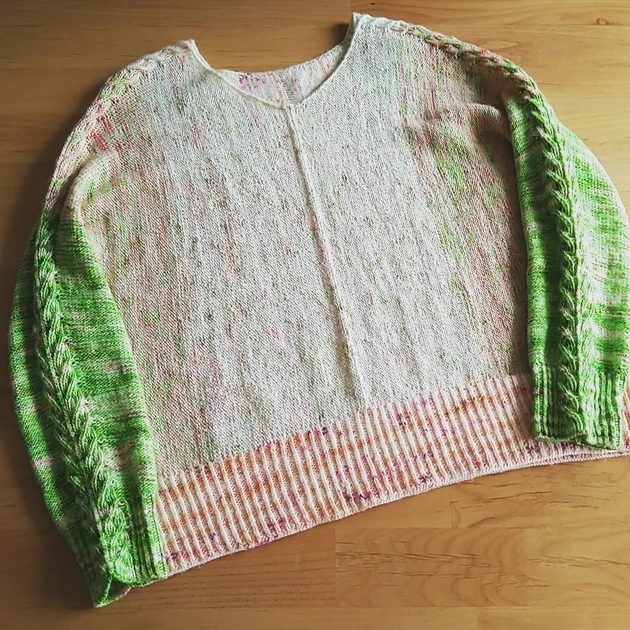
This version luxuriously features multiple colors to create a beautiful, symmetrical gradient. By incorporating alternating one-row stripes right before and after switching colors, the transitions blend seamlessly, creating a beautifully smooth shift in tone.
Hand-Dyed Solid Yarn
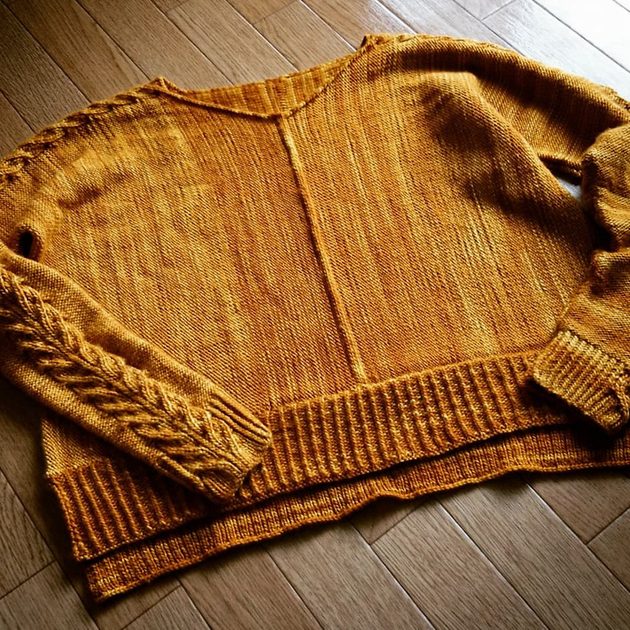
This version uses a solid color yarn that boasts the unique depth only hand-dyeing can provide. Because this pattern is knit sideways, the subtle color variegation inherent to hand-dyed yarn creates beautiful vertical lines across the reverse stockinette stitch. The result is a simple yet incredibly expressive piece.
Commercial-Dyed Sock Yarn
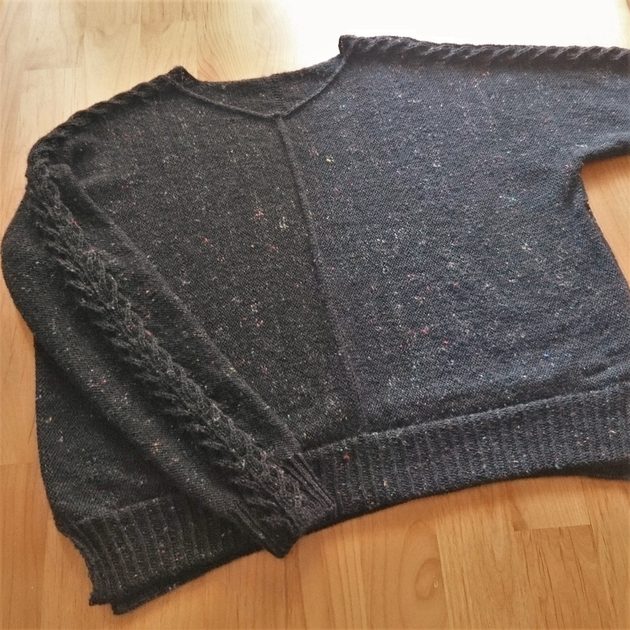
This version uses evenly dyed, commercially produced sock yarn. Without the variegation of hand-dyed yarns, the beauty of the stitches and the silhouette of the pattern truly stand out, resulting in a clean, sleek, and sophisticated look overall.
Cotton Short-Sleeve
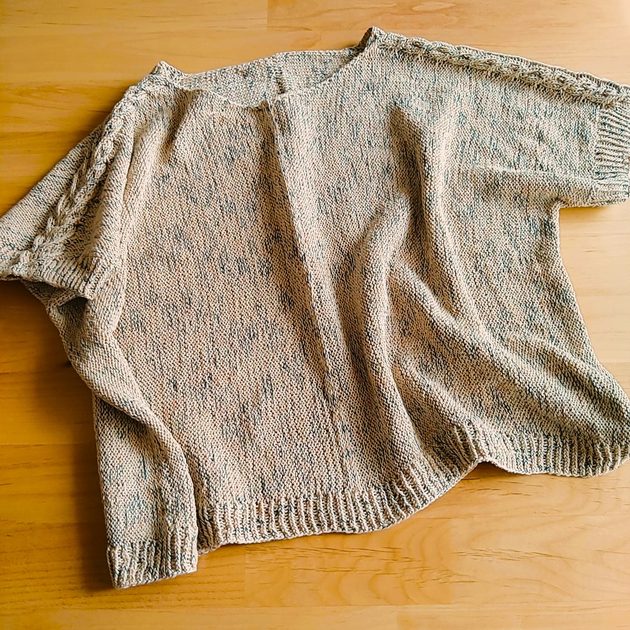
This short-sleeve version is knit with cotton yarn for a light and airy feel. Since this pattern is worked from the cuff, you can easily customize the sleeve to your preferred, breezy length simply by adjusting your starting point.
More ideas
Since this design is knit from the cuff, you can freely adjust the sleeve length from long to short just by changing your starting point. Choosing summer yarns like cotton or linen for a short-sleeve version gives it a casual, easy-to-wear T-shirt feel. You can also get creative by boldly changing the colors for the left and right panels or the hem, or by blending your leftover scraps to create your own unique gradient. For a playful touch, try adding an accent color only to the I-cord line running down the center front and back—the possibilities for customization are truly endless.
Behind the Design
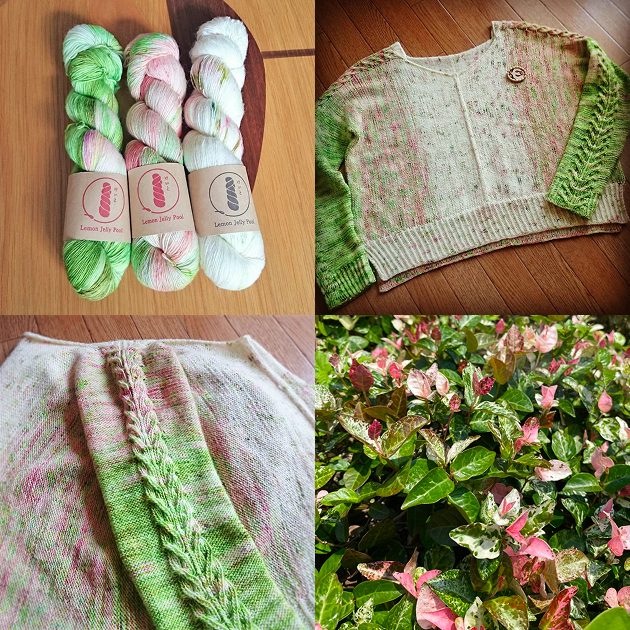
"Hatsuyukikazura" was born from a chance encounter with a beautiful skein of Japanese hand-dyed yarn and a casual conversation with a knitter friend. This piece holds a very special place in my heart as it is the first design I ever wrote out as a knitting pattern.
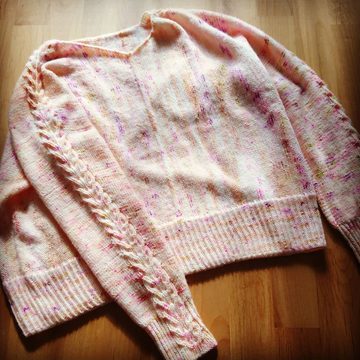
Around 2018, when I was developing this pattern, hand-dyed yarns from domestic dyers were still rare in Japan, and I mostly purchased imported yarns from abroad. It was during that time that I bought my very first yarn from a Japanese dyer, Lemon Jelly Pool. The three skeins that arrived were "rikyu" with a green base, "peach hills cake" with a pink base, and "fig" with a white base. From the vibrant variegated colors to the lovely, speckled dots, each skein had its own unique personality and was truly beautiful. I wanted so badly to bring these three charming skeins to life, and that is how I came to design this pullover specifically for them.
When I showed the finished pullover to a knitter friend, they gave me a wonderful compliment: "The way the variegated colors and speckles blend together, flowing from white to pink and then to green, looks just like Hatsuyukikazura (Asiatic jasmine)." The moment I heard those words, it clicked perfectly, and I decided to name this pullover "Hatsuyukikazura." It was a beautiful moment where the natural gradient of the Hatsuyukikazura plant—with its new leaves changing from pink to white and gradually to green—perfectly mirrored the rich, overlapping colors of each hand-dyed yarn.
This is how my very first Japanese written pattern was born. Based on this foundational design, I carefully made improvements to aspects like the neckline shape and sizing to create the English pattern version of "Hatsuyukikazura."
In the English pattern, I have designed it to be knit with a single color to keep the steps simple. However, just like the original pattern, I highly recommend exploring a gradient by using multiple colors of your favorite yarns. I hope you will mix and match your preferred yarns to bring your own special, unique piece to life.
Photos & Projects
View detailed photos and projects by other knitters.
Login to Ravelry to view other knitters' projects.
View on Ravelry